Bring your own S3-compatible storage
Connect S3-compatible storage to Chunkify, upload source videos directly to your bucket, or transcode files already stored there. Keep control of your source videos' lifetime and choose where each job writes its outputs.
Use videos already in your bucket
Create a source, the video input for a transcoding job, by selecting a connected storage and supplying the object's path. Chunkify reads the original directly. You do not need to upload another copy or generate a download URL yourself.
In the dashboard's upload dialog, choose Storage, select the connection, and enter the exact object key, including the filename.
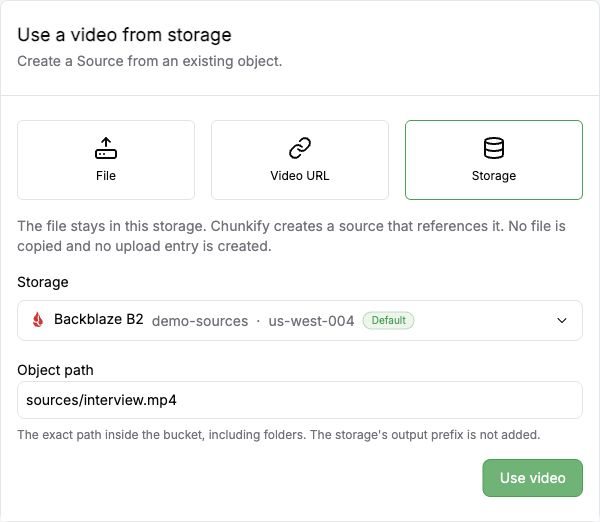
Use an existing object in connected storage. Sample bucket and path.
Use the same input through the TypeScript SDK on your server:
import Chunkify from '@chunkify/chunkify';

const client = new Chunkify({
  projectAccessToken: process.env.CHUNKIFY_TOKEN,
});

const source = await client.sources.create({
  storage: {
    id: 'stor_example',
    path: 'originals/interview.mp4',
  },
});
Omit storage.id to use the project's external default storage. Provide either storage or a video url. URL inputs remain supported. Existing objects in Chunkify's temporary storage cannot be selected through this source-creation API.
Source paths are exact bucket keys. The storage's output prefix is not added. Chunkify keeps the selected storage reference and generates fresh temporary access URLs when it reads the video, including when a queued job starts. Changing the project default does not redirect existing sources.
Keep the source video available and grant the connection read access for as long as jobs need it. Chunkify does not copy or retain it. The Source record still follows your plan's data-retention period; its cleanup does not delete the video in your storage. Reading across providers or regions may incur charges from your storage provider.
Connect an S3-compatible provider
Alongside AWS S3 and Cloudflare R2, you can connect services such as Backblaze B2, Wasabi, and publicly reachable MinIO deployments using S3-compatible in Settings > Storages > New storage.
Supply the bucket, access credentials, public HTTPS endpoint, and provider region. Choose a separate Chunkify location for processing. The provider region signs storage requests; the Chunkify location determines where the workload runs. Chunkify validates bucket access and detects the working S3 addressing style.
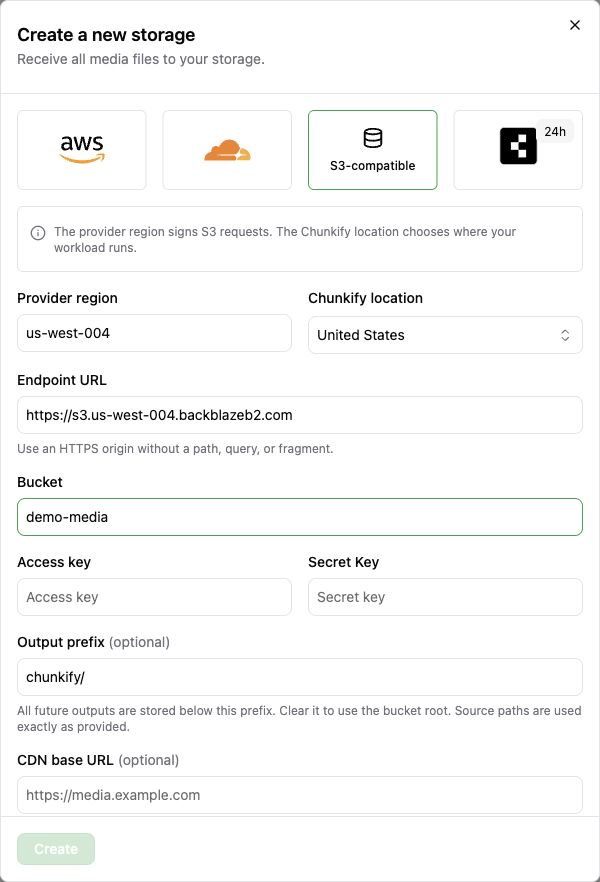
Storage setup with sample values. Credentials are empty.
Custom endpoints must support the S3 operations Chunkify uses and be reachable over public HTTPS. Private-network and HTTP-only endpoints are unsupported. Transfers of processed outputs from Chunkify to S3-compatible storage cost $0.09 per GiB.
Upload directly to the storage you choose
For files on your computer, choose File in the upload dialog and select a destination. The upload can use the project default or another storage connection in the same project.
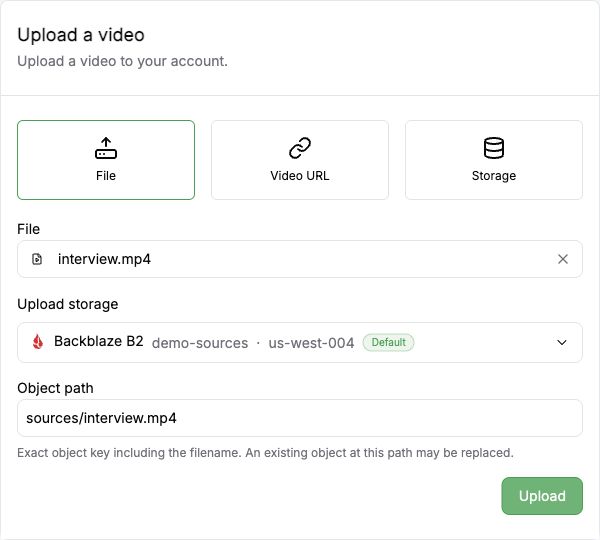
Upload a file directly to connected storage. Sample filename, bucket, and path.
Customer storage requires an exact destination path, including the filename. The output prefix is not added, and uploading to an existing key can overwrite that object. Chunkify temporary storage generates its own path and keeps uploaded objects for 24 hours. You control the lifetime of objects in your own storage.
Update API clients to complete uploads
This release changes the upload contract for every provider, including Chunkify storage. A successful file transfer alone leaves the upload waiting. Clients must follow this sequence:
- Create a session with
POST /api/uploadsonhttps://api.chunkify.dev/v1. PUTthe file to the returnedupload_urland check that the transfer succeeds.- Send an empty
POSTto the returnedcompletion_url. HTTP204confirms that Chunkify verified the file and created its source.
The completion URL authorizes that request. Send no project token or cookies to it. The dashboard handles completion automatically.
This server-side TypeScript example uploads a local file to an external connection and completes it through the SDK:
import { openAsBlob } from 'node:fs';
import Chunkify from '@chunkify/chunkify';

const client = new Chunkify({
  projectAccessToken: process.env.CHUNKIFY_TOKEN,
});

const upload = await client.uploads.create({
  storage: {
    id: 'stor_example',
    path: `originals/${crypto.randomUUID()}.mp4`,
  },
});

if (!upload.upload_url || !upload.completion_url) {
  throw new Error('Missing upload session URLs');
}

const file = await openAsBlob('interview.mp4', { type: 'video/mp4' });
const transfer = await fetch(upload.upload_url, {
  method: 'PUT',
  body: file,
});
if (!transfer.ok) {
  throw new Error(`File transfer failed: ${transfer.status}`);
}

const token = new URL(upload.completion_url).pathname.split('/').pop();
if (!token) throw new Error('Missing completion token');
await client.uploads.complete(token);
Both requests must finish before expires_at. The default session lasts two hours. Retrying completion within a valid session is safe and does not create a second source. After a temporary failure, retry completion without uploading the file again. An expired session returns HTTP 410 and requires a new upload.
The session URLs are returned only when creating the upload. Keep them private and retain them until completion; later reads, lists, and webhooks do not return them. Existing waiting sessions from the previous upload flow will expire at the transition, so clients must create new sessions.
Browser uploads also need bucket CORS rules that allow PUT from your application's origin, or https://chunkify.dev for dashboard uploads. Follow the browser upload CORS guide.
Choose each job's output destination
The dashboard's new-job form now lets you choose output storage for that job without changing the project default. For external storage, enter an output path relative to its configured output prefix. For Chunkify temporary storage, the path is generated for you.
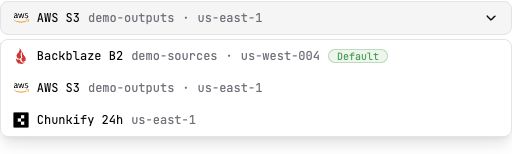
Write this job to AWS S3 while Backblaze B2 remains the project default. Sample buckets.
Input and output storage can differ. For example, read an original from Backblaze B2 and write encoded files to AWS S3. Processing location follows the output storage.
Fixes and alerts
- Source and output preview generation now searches for a usable frame when a video opens on black. Existing previews are not regenerated.
Update custom upload clients to send the completion request and handle session expiry. The video upload guide describes the full flow and destination options.